Wednesday, 22 June 2016

Monthly Makers June: Plants

Last time I went to Nantes I bought an 80s sweatshirt in a vintage shop. It's wonderfully flowery and just the right amount of kitsch! 


I was wearing it the other day, when an idea hit me - why not use it as my inspiration for this month's Monthly Makers theme? I mean, flowers are plants! So I picked a colour scheme similar to the one on the sweatshirt and got cracking!


Of course, with this month's theme being plants and all, I chose a rather floral approach - a bouquet in a rather alternative vase! 


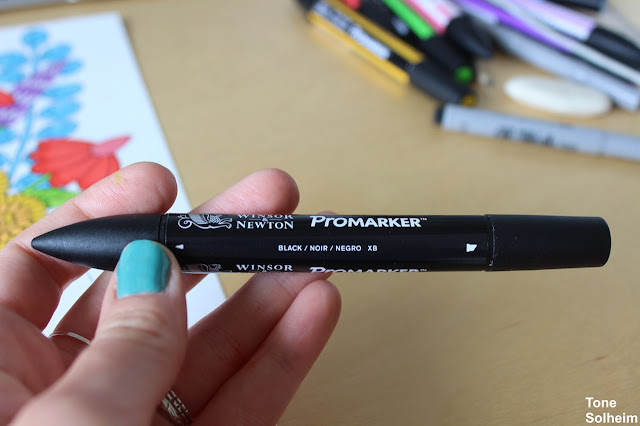
Almost done! Just a final touch of black… 


And ta-dah! 


I really should use black more often, shouldn't I! Using a colour scheme put together by someone else was a fun challenge, and a great way of exploring colour combinations I wouldn't normally use. I know I draw flowers and plants quite a lot (can you blame me?), but there's something really satisfying about drawing a bouquet - I guess it's the amount of detail it requires! One of these days I might just bring my sketchbook to the botanical garden and spend an hour or two sketching. That's one more thing to put on my summer to-do list!


Do you have a favourite plant or flower? Mine's the cuckoo flower! 

Monday, 6 June 2016

Experimenting with ink

Last autumn I bought a bottle of ink. It was on list of stuff I was recommended to buy for the art class I'd signed up for, but for some reason we never actually got around to using it, so the bottle's been left untouched. Until now, that is!

I wanted to start off with something not too complicated, so I figured some simple line work would do the trick. Began with a pencil sketch, as per usual: 


I then jumped straight to the colouring. I really enjoyed colouring the pencil sketch - that's something I rarely ever do!


Then I brought out the ink, and the finest pencil I had available: 


… And started painting! 


The final result: 


I don't know if you can really tell that I've used ink and pencil rather than a regular pen liner, but personally I do feel there is a difference! 


What is your experience with pencil and ink?

Monday, 30 May 2016

Easy no-pattern skirt


(Isn't this just the most magical fabric you ever did see?)

I'm not the most experienced of seamstresses, what with being mostly self taught and all, but I love experimenting with my Singer and often create my own patterns for dresses and tops and the like of it. But if you're new to sewing (like I was about a year ago) you might find patterns rather intimidating.  Don't worry, though - this skirt doesn't even need a pattern! And it only takes about an hour to make (even less if you're heavy on the foot pedal!). 

I've made a skirt like this once before, and it really is the easiest thing ever. You can either use one long rectangular piece of fabric, or two smaller pieces that you sew together. I went for the second option, as the piece of fabric I had available wasn't big enough for the first option. You decide the length and width of the fabric you use based on the circumference of your waist and how much volume you want the skirt to have. I only had enough fabric for a mini skirt, but you're free to adjust the length of the skirt as you wish. And remember - the wider the pieces of fabric, the fuller the skirt! 


I always iron the fabric before I start sewing: 


(Maybe it's time I invested in a proper ironing board…?)

Once ironed, put the two pieces of fabric together (right side against right side) and secure with sewing pins along the short edges... 


And sew!


Feel free to fasten the 'fold' as you see fit. I usually fold it over to one side and sew over it once more so that it stays in place. 


Repeat on the other side. You'll now have an enormous tube of a skirt:


Now the time has come to hem the waist. I do this by first folding down the desired width of the hem, before folding it once more (start in one place and work your way around). I'm sure there are many ways to hem the waist of a skirt - use the method you like best! Just make sure to leave enough room for an elastic band to be threaded through afterwards (make sure to adjust the size of your hem according to the width of the elastic band you want to use). 


When sewing, remember to leave a small opening for inserting the elastic band!


I use safety pins when threading elastic bands: 


Once you've threaded the elastic band through all the way it'll look something like this:  


I find the best way to adjust the length of the elastic band is to wear the skirt while adjusting it - that way you're guaranteed to get the right fit! I fasten the elastic band by tying the two ends together (very crude, I know) before sewing the gap shut with the sewing machine (you can also do this by hand if you wish):


Don't forget to hem the bottom of the skirt too! And just so you know - the bobbin thread will ALWAYS run out 10cm before the finish line. Always. This is completely normal. It never fails: 


But it does help that once you've refilled the bobbin, re-threaded the machine and finished the remaining 10cm of hem (all while quietly cursing Murphy and whoever else might be out there), you're left with a fully functioning skirt: 


I'm not at all skilled at mirror selfies, but I'm gonna throw one in anyway:  


I now wish all my clothes had golden ladybugs on them. 


Have you ever sewn a skirt? If so, how did you do it?


Saturday, 21 May 2016

Marker mandala

A while back I had a dig through a bunch of old drawings. I came across a couple of marker mandalas I made about a year ago, and decided to make another one! I started off by choosing a pleasing colour palette: 


Of course, snacks and tea are compulsory when drawing (in the background you can see some of the old mandalas I dug out): 


I start drawing my mandalas by making a circle in the middle of the paper and then take it from there, continuously expanding the mandala ring by ring until the paper has been filled:  


I didn't have any plan whatsoever for what I wanted the mandala to look like. I just drew whatever shapes felt natural: 


Once I'd finished with the markers, I used a fine black liner to make the mandala look a wee bit more interesting, once again starting in the middle and drawing my way outwards:  


And, after a couple of hours' work… Ta-da!


Have you tried drawing mandalas? 

Monday, 16 May 2016

SmallWorld

A friend of mine recently commissioned a drawing of our little group of friends playing the board game SmallWorld together. What a fun challenge!

I started off by drawing our living room, where the board game playing usually takes place: 


Then, sat on the sofa, I drew my boyfriend as a skeleton: 


One friend I decided to draw a wise mage, and myself I turned into an elf: 


The commissioner himself got to be the evil sorcerer: 


I then added the background and, of course, the actual board game: 


I love watching my drawings slowly come to life as I add colour after colour (it's the best feeling): 


That's the colouring part done with: 


And here's the end result: 


I thoroughly enjoyed creating this drawing, and I'm keeping my fingers crossed for more commissions like this one in the future!


Have you ever played SmallWorld? 


Tuesday, 10 May 2016

Surreal Landscape

We're still doing landscapes in arts class, and I'm actually kind of enjoying it! What is more, I've now reached a point where I willingly reach for my dry pastels at the beginning of every lesson - I honestly never thought this day would come! We can of course use whichever medium we want, but I find that pastels are just so pleasingly straight forward and simple to use. No beating around the bush, and no need to wait for the paint to dry. 

Last Tuesday our arts teacher handed us these two printouts: 


She told us to use the photo on the left as inspiration, including whichever trees we liked the best from the image on the right. Fun! This where I left off at the end of our two-hour class: 


As you can see, I'd managed to finish the tree on the left, but the other two trees plus the foreground remained unfinished. But, of course, I couldn't just leave it like that! So yesterday I dug out my dry pastels again and got cracking: 


About two seconds in my fingers looked like this: 


And before I knew it I had finished the whole thing!


This has been my favourite pastel project so far. The end result is both simplistic but still strangely surreal, I think. And I love how there's a summer storm brewing in the background. 


Creating art is a dirty business for sure! 


Have you ever tried dried pastels?